Quick Fixes For Damaged Wood Floors: Tools, Fillers, And Finishing Tips
LifeCare & Lifestyle
|
April 14, 2026
Those deep gouges in your hallway or the unsightly gaps between your planks don't necessarily signal the end of your floor's life. Many homeowners assume that once the finish is marred or a plank begins to creak, a massive, dust-filled professional sanding project is the only solution.
Those deep gouges in your hallway or the unsightly gaps between your planks don't necessarily signal the end of your floor's life. Many homeowners assume that once the finish is marred or a plank begins to creak, a massive, dust-filled professional sanding project is the only solution.
However, you are likely missing out on a suite of precision hardwood floor damage repair techniques that can restore the luster of your home in a single afternoon. By mastering a few specific spot-repair methods, you can bypass the high costs of a full renovation and keep your original timber looking pristine.
Identifying The Culprits: Why Wood Floors Fail
Wood is a hygroscopic material, meaning it constantly breathes, absorbing and releasing moisture from the air. This movement is the primary driver behind most floorboard repair needs.
Humidity And Seasonal Shifts
In winter, when indoor heating dries out the air, wood planks shrink, creating gaps. In the humid summer months, they expand. If the floor was installed too tightly, this expansion causes cupping, where the edges of the boards rise higher than the center. Understanding this cycle prevents you from overfilling gaps meant for seasonal movement.
Structural Settling And Impact
As a house settles, the subfloor can shift, leading to the dreaded floorboard squeak. Simultaneously, daily life—dropped kitchen knives, moving furniture, or a pet's frantic sprint—creates the need for wood floor scratch repair. These are mechanical damages that require a different approach than moisture-related issues.
The Threat Of Moisture
Perhaps the most daunting task is repairing water damage to hardwood floors. Whether it's a leaking dishwasher or a forgotten potted plant, water can saturate the wood fibers, causing them to grey, rot, or buckle. Identifying the extent of this damage is the first step in determining whether you can handle the fix yourself or need to start searching for hardwood floor repair near me to find a specialist with industrial drying equipment.
Essential Materials For High-Quality Wood Floor Repair
The difference between a patch job and a professional restoration is the quality of the filler and the accuracy of the color match. You cannot simply use a generic wall spackle; you need materials that mimic the density and take of wood stain.
1. Wood Fillers (Water-based vs. Solvent-based): Water-based fillers are easy to clean and dry quickly, making them ideal for small timber floor repairs. Solvent-based fillers are more durable and shrink less, which is better for larger holes.
2. Wood Wax Sticks: These are essentially high-pigment crayons made of hard carnauba or beeswax. They are the secret weapon for wood scratch repair because they don't require sanding or refinishing.
3. Wood Flour and Resin: For a perfect match, professional installers often mix wood flour (extremely fine sawdust from the same wood species) with a clear resin or wood glue. This creates a paste that ages and reacts to light exactly like the surrounding floor.
4. Cyanoacrylate (CA) Glue: Often used in woodworking, thin CA glue can be wicked into hairline cracks to stabilize a splintering board before it breaks off entirely.
If you find yourself overwhelmed by the sheer variety of wood species—from the red undertones of Oak to the creamy swirls of Maple—don't worry. Most modern wood floor repair kits allow for custom blending, much like mixing paint on a palette.
Step-By-Step Guide To Fixing Scratches And Gouges
When you approach a wood floor scratch repair, think of yourself as a restorer, not a construction worker. The goal is to build the repair in layers to ensure it stays put for years.
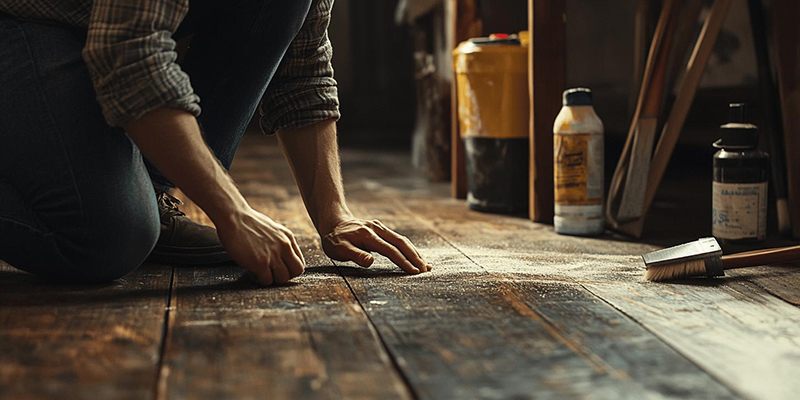
Step 1: Preparation And Cleaning
Never apply filler to a dirty scratch. Use a soft vacuum attachment to pull dust out of the crevice, then wipe the area with a microfiber cloth dampened with a bit of mineral spirits. This removes any wax or floor polish that would prevent the new material from bonding.
Step 2: The Blue Tape Trick
To prevent the filler from entering the healthy wood surrounding the damage, place painters' tape around the perimeter of the scratch. This limits your work area and significantly reduces the amount of sanding required later.
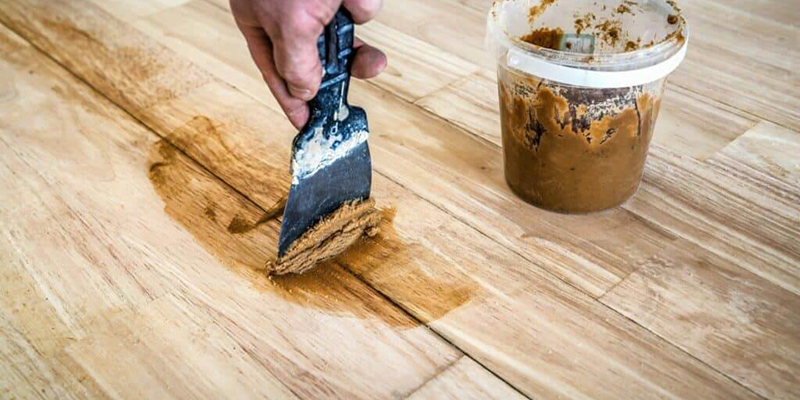
Step 3: Filling The Void
For deep gouges, use a flexible putty knife to press your chosen hardwood floor repair filler into the hole. Overfill it slightly, since most fillers shrink as moisture evaporates. If using a wax stick, rub the stick across the scratch until it's level, then buff away the excess with a clean cloth.
Step 4: Leveling And Sanding
Once the filler is bone-dry (usually 2 to 4 hours), use a fine-grit sandpaper (220-grit or higher) wrapped around a small wooden block. Sand only in the direction of the wood grain. If you sand across the grain, you will create new scratches that will show up vividly once the finish is applied.
Mastering The Finish: Blending The Repair
The most common mistake in hardwood floor damage repair is stopping after the filler is dry. A patch of filler is porous and will quickly turn black with dirt if not sealed.
To achieve a seamless look, you must match the sheen of your floor. Most modern floors have a polyurethane finish that ranges from Matte to High Gloss. You can purchase touch-up pens or small cans of wipe-on poly. According to the National Wood Flooring Association (NWFA), the key to a successful touch-up is feathering the edges—applying the finish lightly at the center of the repair and brushing it out thinly into the surrounding area so there is no hard line where the new finish begins.
For older homes with wax or oil finishes, a simple application of a tinted floor wax can work wonders. This is often the best route for timber floor repairs in historic properties where a plastic-looking polyurethane would look out of place.
Navigating Hardwood Floor Repair Water Damage
Water is the natural enemy of timber. If you catch a spill early, you might avoid a major headache. However, if the wood has already begun to cup (edges higher than the center), you need a more aggressive strategy.
1. Dry it Out: Use fans and a dehumidifier. Do not use a heat gun, as extreme heat can cause the wood to crack or the finish to blister.
2. The Wait and See Approach: Sometimes, cupped floors will flatten out on their own once the moisture levels in the subfloor return to normal. This can take weeks.
3. Sanding the Peaks: If the floor remains cupped after it is dry, you may need to sand down the peaks of the boards to make the floor level again. This is a delicate process; if you sand too much while the wood is still wet, the boards may crown (rise in the center) once they dry out.
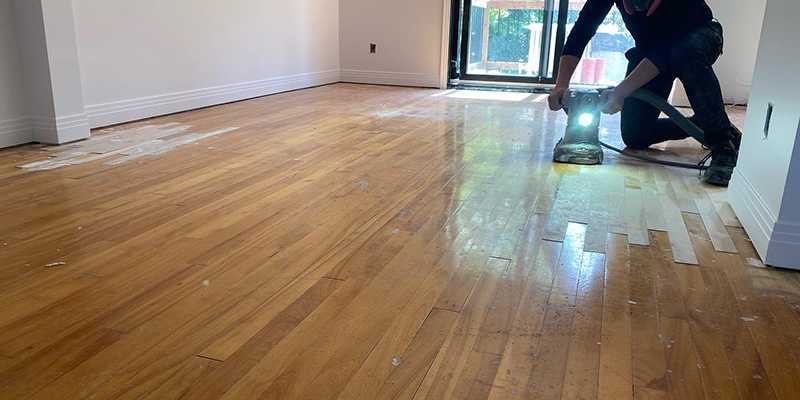
If the damage covers more than a few square feet, this is when searching for wood floor repair near me becomes necessary. Professionals use moisture meters to ensure the wood is stable before they attempt any permanent sanding or refinishing. For more technical data on how moisture affects different wood species, the University of Minnesota Extension provides excellent resources on residential moisture management.
When To Call a Pro: DIY Vs. Professional Restoration
While a wood scratch repair is a weekend project for most, some issues require heavy machinery and years of experience. You should consider professional hardwood floor repair if:
- The Wear Layer is Gone: If you can see bare wood across large areas, the entire floor needs to be sanded and resealed.
- Structural Rot: If the floorboards feel spongy or soft underfoot, the subfloor may be compromised by long-term water exposure.
- Extensive Gapping: If you can see the subfloor through the gaps between planks, the floor may have been installed incorrectly or suffered severe environmental damage.
In these cases, a local expert can provide sand-and-finish services that restore the entire surface to a uniform appearance. However, for the vast majority of daily wear and tear, your own two hands and a few well-chosen materials are more than enough.
Preserving The Soul Of Your Home
Taking the time to perform a targeted hardwood floor repair is about more than just aesthetics; it's about stewardship. Every time you fix a scratch or stabilize a loose floorboard, you are extending the life of a natural material that took decades to grow. By using the right fillers, mastering the art of the color match, and understanding the unique needs of your specific timber, you ensure that your home remains a warm, inviting sanctuary. Don't let a few minor imperfections discourage you—these professional tips will help your wood floors continue to tell their story for generations to come.
Was this helpful? Share your thoughts